In this guide we will provide you with the step-by-step instructions needed to easily and cleanly lay your decorative aggregates. This way you won't suffer from any weeds or spillages.
Laying on Soil
Step 1 - Clearing the area
The first key step is to ensure all vegetation and loose material has been removed from the area you are wanting to place your stone. Make sure to be thorough with doing so, using a good weed killer to clear any deep-rooted weeds will leave your finished project looking fresh.
Step 2 - Level the ground
Ensure the placement area is levelled out and even. Using a high quality steel rake should bring up any small items or materials such as natural stones, leaves, or twigs. While you can also use a sturdy spade to redistribute any dirt as needed. Continue this process until the area is as level as possible.
Step 3 - Ground preparation
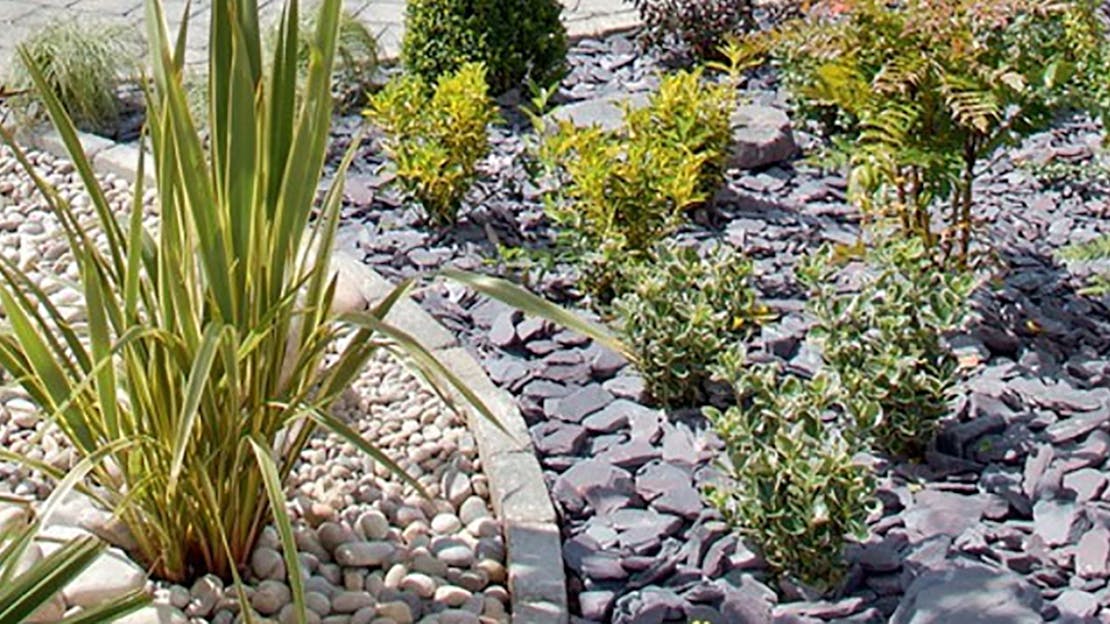
You may choose to place your aggregate directly onto your soil which is great for helping with water drainage. Using the right type of stones, which are porous in nature, can help with this as they will absorb a lot of rainwater before it reaches the soil layer. The only things to consider when placing directly on soil is the potential risk of growing back weeds if they are deep rooted beyond where weedkiller and raking can reach. This may allow them to grow back up and out between gaps in the stones which would need regular maintenance. There is also a potential risk of natural earth movements and pressure from walking over the stone causing slight movements and sinking. A way to counteract any sinking may be to use a small-sized aggregate.
To avoid the above issues a way to tackle this would be to lay either a landscaping fabric or plastic weed membrane. This would stop anything growing through the stone and appearing on the top. It also provides a base layer which may assist in preventing any sinking of stones. If you require multiple sheets to cover a larger area it is wise to overlap the sheets by approximately 50mm to avoid weeds rising between the sheets. It would also be advised to leave additional material around the borders to stop weeds popping up at the sides.
Step 4 - Creating room for plants (optional)
If you decide you would like to add any plants either along the border or within the decorative stone you will need to plan out where you are going to want them to go before going ahead with anything. Once you’ve set a position, cut an X shaped cut under the material if one is being used. The incision needs to be as small as possible whilst not restricting the plant from growing.
Ensure the soil from planting doesn't end up on top of the material as this will allow for weed growth and disruption to the stone.
Step 5 - Laying the aggregate
For the best coverage, the depth of the aggregate should be around 40-50mm but this may vary depending on the type of aggregate being used. Once the stones are down, use a rake or similar tool to level off. Using large stones, flags, timer or edging can create a barrier around the stones which may assist with reduced movement as well as helping to keep weeds at bay.
Laying on flags or concrete
Step 1 - Prepare the area
Clear any furniture or obstructions off of the area being used. Ensure to sweep the area to remove any small debris that may cause an uneven surface. If the area is surrounded by soil or grass, remove a section around all edges to create space to anchor any landscaping fabric or weed membrane. Use weed killer to remove any weeds and prevent weed growth between any gaps in flags etc.
Ensure a drainage route for rainwater is available to avoid any standing water sitting under or above your aggregate.
Step 2 - Secure the base layer
If a https://www.fitzpatrick-fuels.co.uk/Weed-Control is being used, roll it out making sure it is as flat as is possible and secure using wooden stakes around the edges where an anchoring point was made. Use the dug-out soil or material to cover the anchor points. Place a thin layer of sand on top of your landscaping fabric or weed membrane to create a base for your aggregate, level off using a rake. The aggregate is ready to be laid, for the best coverage the depth should be around 40-50mm but this may vary depending on the stone being used. Using the same rake as before to level off the stone, it's ready to use.
If a more secure base is needed then a gravel grid could be used instead. These are used to stabilise the stones assisting in reduced movement. Gravel grids are made of reinforced strips of hard plastic meaning they provide a strong base whilst being environmentally friendly, permeable, weatherproof, and rot-free. Using a gravel grid means the stones are evenly distributed, this assists with achieving even coverage.
Gravel grids are placed on top of a landscaping fabric or weed membrane again to avoid any weeds growing through the stones. This will also help keep stones clean.
Follow the above steps before laying the base material but instead of placing sand on top of the material, the gravel grids will be placed instead. The panels should interlock using a slot and peg snap connection. The grids may need to be cut to size and shape depending on the area being laid. Once these have been secured in place, they are ready for the aggregate. Various types of aggregate may be used, for the best results, it is advisable to use a stone sized between 8-20mm filling to a depth of 20-35mm. The stones will need to be raked in order to level them out. The stones will typically settle over a 4-6 week period.
To calculate how much aggregate is required please give us a call, we will be more than happy to assist you in calculating how much aggregate you need to cover the area. All we need is the measurements and we can give you the best advice. If you need information about other aggregates or your garden, then we have a range of high quality articles!